What Is Cold Process Soap Making?
The "cold" in "cold process" refers to the fact that no external heat is applied, as the reaction itself generates the necessary heat. When lye meets fats and oils, it breaks down their molecular structure and recombines them into soap molecules. Each soap molecule has two ends, one that's attracted to water, also referred to as hydrophilic, and one that's attracted to oils, also referred to as lipophilic.
Soap Making Equipment and Tools
- Digital Scale. You'll need a digital scale that can measure in both ounces and grams. The more precise, the better.
- Heat-resistant Containers. For handling lye. Stainless steel high-grade plastic marked with #2 HDPE or #5 PP. Don't use aluminum.
- Thermometer. One that can safely measure temperatures up to at least 200°F (93°C).
- A Large Pot. Stainless steel preferred. Some soapmakers prefer to use slow cookers dedicated to soap making, as they provide consistent heat for melting solid oils.
- Mixing Tools. Heat-resistant spatulas and mixing spoons are invaluable to the process. Same with stick blenders as they dramatically reduce the time it takes to stir the batter.
- Soap Molds. Simple loaf molds and silicone molds are equally acceptable to start with. That said, we like silicone molds because they don't require lining and are flexible enough to make removal easier.
- Cutting Tools. A sharp knife, wire cutter, or bench scraper will work.
- Curing. Wire cooling racks and soap curing trays are your friend. Maximizing air circulation is the key to curing cold process soap.
- pH testing strips.
- Recipe Notebook.
Safety Measures
Your main worry in cold process soap making is avoiding the harmful effects of lye. Sodium Hydroxide (lye) is a caustic chemical that can damage your skin, eyes, or even respiratory system. When lye meets water, it creates an extremely strong alkaline solution that can cause severe chemical burns.
Keep your working area free of children and pets, and keep it well-ventilated to remove any fumes that may be created in the soap making process.
If lye gets on your skin, immediately flush with cool running water for at least 15 minutes. For eye contact, flush for 20 minutes and seek immediate medical attention.
Pro Tip: Keep your soap making ingredients and tools separate from your daily household items. In short, do not reuse anything in your food prep. Also, proper labeling goes a long way in preventing accidents. And lastly, store your lye in a secure and dry place where children can't access it.
Protective Gear To Use
- Chemical-resistant gloves (nitrile or neoprene, not latex)
- Safety goggles that fully protect your eyes (not just regular glasses)
- A face mask or respirator (to protect against fumes)
- Long sleeves and long pants
- Closed-toe shoes
Emergency Supplies
- White vinegar (to neutralize lye spills)
- Clean water for immediate rinsing if lye contacts skin
- Basic first aid supplies
Also, keep a phone in your workspace to call emergency services. Whether that's your smartphone or a landline, it's better to have it and not need it than the other way around.
Soap Making Prep
Start with a deep cleaning of all your equipment. Every tool needs to be thoroughly washed and dried, as any residue could interfere with the saponification process.
For your work surface, create a clean, organized space by laying down several layers of newspaper or craft paper. This has the dual effect of making cleanup easier while protecting your workspace. Create stations for each of your steps. Being organized goes a long way to preventing accidents.
If you're opting for wooden molds, line them carefully with freezer paper, shiny side up. The paper should be smooth against the wood with precise corners. Silicone molds don't require lining, so no worries there on using freezer paper. Some soapmakers like to lightly spritz silicone molds with rubbing alcohol to help prevent soda ash formation, but that's a dealer's choice situation.
Next up is labeling your containers. Be clear and consistent. Soap making is a fun hobby, but it can be dangerous if done haphazardly. Labels of "Lye Only" and "Oil Only" are highly specific and get the point across. Like Egon said, don't cross the streams.
Prior to getting going, you should test your tools. Make sure your ventilation is good (a room fan works). Make sure your immersion blender is clean and operational. Check the battery life in your digital thermometer. Lay out protective gear. Check your gloves and goggles.
If this all seems basic (not a alkaline pun), it's because it is. Being pragmatic and smart will go a long way to keeping you safe.
How to Make Cold Process Soap
Step 1. Recipe Preparation and Safety Setup.
Before touching any ingredients, you'll need to calculate your recipe using a soap calculator. This determines the exact amount of lye needed for your chosen oils. Put on your safety gear (goggles, gloves, long sleeves, and mask) and ensure your workspace is well-ventilated.
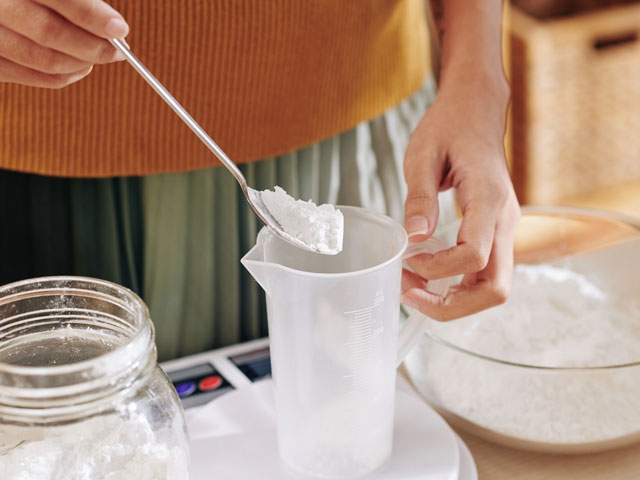
Step 2. Measuring Your Ingredients.
Using your digital scale, measure your solid oils (like coconut and palm) in one container and liquid oils (like olive and castor) in another. Separately, measure your lye and distilled water precisely according to your recipe calculations. Remember, even small measurement errors can affect your final soap.
Step 3. Preparing the Lye Solution.
You've done your safety prep and your measuring. Next up is to slowly add your measured lye to the distilled water (never the reverse). The solution will heat up rapidly through an exothermic reaction, potentially reaching 200°F (93°C). Allow this solution to cool to around 100-110°F (38-43°C). The solution will appear clear when ready.
Step 4. Preparing Your Oils.
While the lye solution cools, melt your solid oils gently. Once melted, combine with your liquid oils. The oil mixture should also be around 100-110°F (38-43°C). This temperature matching is crucial because it ensures even saponification.
Step 5. Combining Lye Solution and Oils.
When both mixtures reach the target temperature range, slowly pour the lye solution into the oils. This is where the transformation begins. Using your immersion blender, pulse in short bursts while stirring by hand in between. This prevents air bubbles from getting trapped in your soap.
Step 6. Reaching Trace.
Continue blending until the mixture reaches "trace". Trace is a state where the soap batter leaves a visible trail on the surface when drizzled (like pudding consistency). This indicates that saponification has begun. The time to reach trace varies depending on your oil choices but typically takes 5-15 minutes with a stick blender.
Step 7. Adding Fragrance and Additives.
If you're using fragrance oils, essential oils, or colorants, this is when you add them. Stir them in gently. Work efficiently as the soap will continue to thicken.
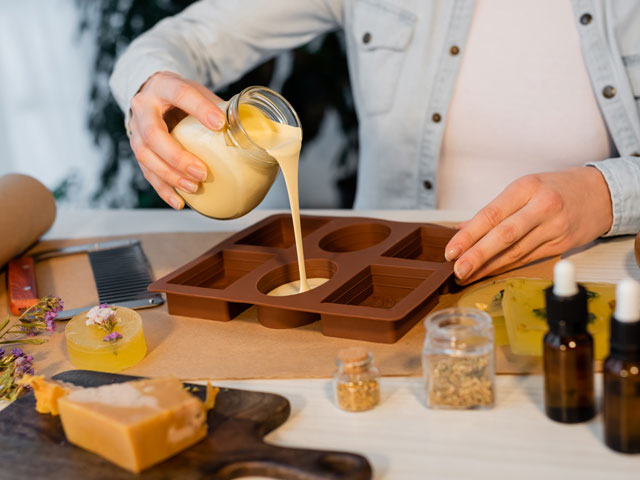
Step 8. Molding.
Pour your soap batter into your prepared mold (loaf, silicone, etc.). Tap the mold gently on your work surface to release any trapped air bubbles. If you want a textured top, you can create peaks or swirls with a spoon or spatula.
Step 9. Insulation and Initial Saponification.
Cover your mold with cardboard or a lid, then wrap in towels unless your recipe specifically suggests otherwise. This insulation helps the soap go through "gel phase," a stage of saponification where the soap becomes slightly translucent and heats up internally. The soap needs to stay in the mold for 24-48 hours.
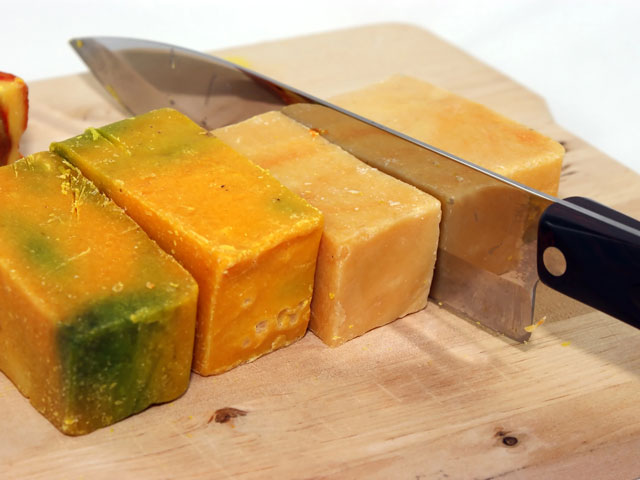
Step 10. Cutting.
Once your soap has hardened (usually after 24-48 hours), remove it from the mold and cut it into bars. The soap should be firm enough to cut but still slightly soft.
Step 11 Curing.
Place your cut bars on a curing rack in a well-ventilated area, with space between each bar. The soap needs to cure for 4-6 weeks. During this time, excess water evaporates, the pH continues to neutralize, and the bars become milder and longer-lasting.
Frequently Asked Questions (FAQs)
What is the history of Cold Process Soap?
The earliest known soap-making practices date back to ancient Babylonia, around 2800 BCE. Clay tablets discovered in this region contain the first known written soap recipe, describing a mixture of fats boiled with ashes. The Babylonians understood, even then, that combining fats with alkaline materials created something with cleansing properties.
The Middle Ages brought significant advances in soap making. By the 7th century, soap making was an established craft in Italy and Spain. The city of Castile, Spain, became famous for its soap made from olive oil rather than animal fats, leading to the Castile soap that we still use today.
A major turning point came in 1791 when Nicolas Leblanc developed a process for making sodium hydroxide (lye) from common salt. This made standardized, high-quality lye available to soap makers for the first time. Before this, soap makers had to leach their own lye from wood ashes, a process that was imprecise and led to varying soap quality.
The Industrial Revolution transformed soap making from a craft into an industry. Modern cold process soap making combines these ancient techniques with scientific understanding. Today's soap makers benefit from precise measurements, pure sodium hydroxide, and detailed knowledge of oil properties that their predecessors developed through centuries of trial and error.
In the end, the principle remains remarkably unchanged. Soap making is the careful combination of fats or oils with an alkaline solution.
Cold Process vs. Hot Process Soap
What is the difference between the two? Let's examine it.
The main difference lies in how each method handles the saponification process. Cold process soap making is a slow, patient approach, while hot process actively speeds up the reaction time through an external heat source. Hot process soap making offers more control. The heating process also sheds some of the water content that of course gets burned off throughout the creation of the soap. You also witness saponification in real-time, as start to finish takes between 1-3 hours in total.
Hot process bars of soap often appear rougher than their smooth cold process counterparts. They are also ready for use almost immediately, as the curing process is reduced to 24-48 hours as opposed to several weeks. If you're selling soap and have to fulfill a large unexpected order, you may find yourself turning on that slow cooker to fire off a few batches of hot process soap.
Cold Process vs. Melt and Pour Soap
The primary difference between cold process and melt and pour is that cold process soap is made from scratch by combining oils with lye to create soap through saponification, while Melt and pour uses a pre-made soap base that's melted, customized with additives, then poured into molds to create anew.
Melt and pour is a better starting point for children and those inexperienced working with chemicals, as no lye is involved in the Melt and Pour process. Sure, it's limiting in so far as you can't get too creative, but when safety is a concern, it's the pragmatic choice.
Much like Hot Process Soap, a bar of Melt and Pour is ready to use almost overnight.
Cold Process vs. Glycerin Soap
Glycerin soap, the product, and not glycerin being part of a soap making process, is different than Cold Process soap as it undergoes an additional ingredient-adding process involving sugar, alcohol and added glycerin. The alcohol is what gives Glycerin soap its translucence.